Wednesday, January 7, 2015

A Trip to Wadderville

In House Belle blouse

Yesterday I cut the final item in my mini-wardrobe, the black V9032 pants. And I bought a (much needed!) white V-neck tee from Target which will also sub in photos for the below fail.

I don't have any plain white tees or any plain white shirts for that matter, and the white rayon challis Belle Bow blouse was supposed to remedy that. Only it did not work out. Not at all.

Like, I have put it on my body approximately 19 times, made a face and then took it off. So we all know that if it remains in the closet it will never get worn. Sigh. It has such a pretty, almost vintage feel to it :( And I used nice buttons!!!!

I love my first Belle blouse. Love.Love.Love. So, I blame this fabric. I think I like rayon challis a whole lot; in very simple garments (like, front, back, hem, done).

I washed and dried it before use but it seems to grow and grow and grow. And it wrinkles if you consider looking at it.

Ah well.


Vogue 8904

The Christmas dress did not work out either.

Not only did it turn to a giant blob of pepto-pink, it was so short and tight that I can't even SHOW the back!!!


I was careful with all my marking 


ooh! Shingles!!!


Err? 

I cut a size 16 based on BMV experience as there are NO finished measurements anywhere (c'mon Vogue). Once I had the front fully assembled, I was doubtful of it fitting and sewed it with 3/8" seam allowances - still too tight! 

I wonder if, with the shingles cut all sorts of ways; you're not really using the stretch of the fabric. Would this be better in a 4-way (2-way? however it works) knit? Do I just size up to an 18??

It's also short. short. short. And yes, I know I should have measured the length. Bad, bad sewer. I tried adding a band to the bottom; did a crappy job on that, ripped it out (put it on my head as a headband) and continued to marvel how this dress went so wrong when it looks so great on everyone else. Maybe I'll try again this spring :)

But alas, there is hope!!!!! To be fair, both of these wadders occurred in 2014.

Remember this muslin?


I could not stop thinking about this top so I pulled it back out and decided what needed to change to have it be wearable.

1) fabric with more drape
2) more bust room
3) wait, more room everywhere

I used an inky navy blue ITY, still used size 16, but sewed 3/8" seam allowances at the front raglans, 1/2" at the back and 3/8" side seams from sleeve to hem.

After trying it on it was a bit too baggy at the armpit so I took it in to 5/8" from about 2" on either side of that seam.

I liked it SO much that I got up early Tuesday morning to hem it and wore it to work that day!

The color makes it a bit tough to get photos...

I will definitely be sewing this one AGAIN. I just have to be mindful of the fabric choice as it'll affect the way the collar sits.

**I could get zero contrast so I had DD take the pics. I told her I needed "pictures of the shirt" and she cut off my head.  Sigh. :)


Vogue 8597 (OOP):


One thing you don't see is that this pattern has 2 piece sleeves. I keep finding myself confused about 2 piece sleeves and then having some sort of epiphany. I suppose this 2-piece sleeve eliminates the need for a dart on the raglan? Did I get it right?!? :)

It has nice deep hem allowances (1 1/4") and a decent length in the body and sleeves. So if you're tall, measure first! I have somewhat long arms for my frame and took a 1.5" sleeve hem and still have considerable length.

The cowl is not low at all and in the right fabric seems to sit rather nicely. 

I want to make view C (with attached cowl) in the longer tunic length, with those crazy long sleeves. Mmmmmm in a soft jersey I bet that will be heaven!

Sunday, January 4, 2015

FINISHED! Style Arc Sandra

Well at least you'll get a break from me for a little while because I can't sew another stitch right now! :-p

First thing's first; I really, truly LOVE them! I am very proud of myself for taking the leap.

top is Burda 6990

I was pretty excited to see SA offer their patterns on Etsy, even though I do not like pdf's very much. I'd been wanting to try them but was held back by 1) single sizing and 2) shipping costs. Well, the Etsy shop purchase gets you 3 sizes (so I got 14, 16, 18) and obviously, no shipping. The trade off is taping.

Pattern Sizing:

They are available in sizes 4 - 30; I cut a size 16 based on the size chart.

Were the instructions easy to follow?

NO. NO. NO. 

But I've sewn Burda and Lekala and if you can get through those, you can get through anything! LOL!

I read through them before I ever put the pattern together and after about 3 seconds was in lalaland. I read a few different jean sew-alongs on blogs and realized the actual construction isn't much different from any other pant.

What did you particularly like or dislike about the pattern?

One thing I noticed right away when reading reviews, nearly everyone had their coin pocket on the left. But all of my rtw jeans has it on the right. The SA tech drawing has it on the right! But it's drafted for the left side.  Obviously changing this isn't a big deal, but it was wrong.

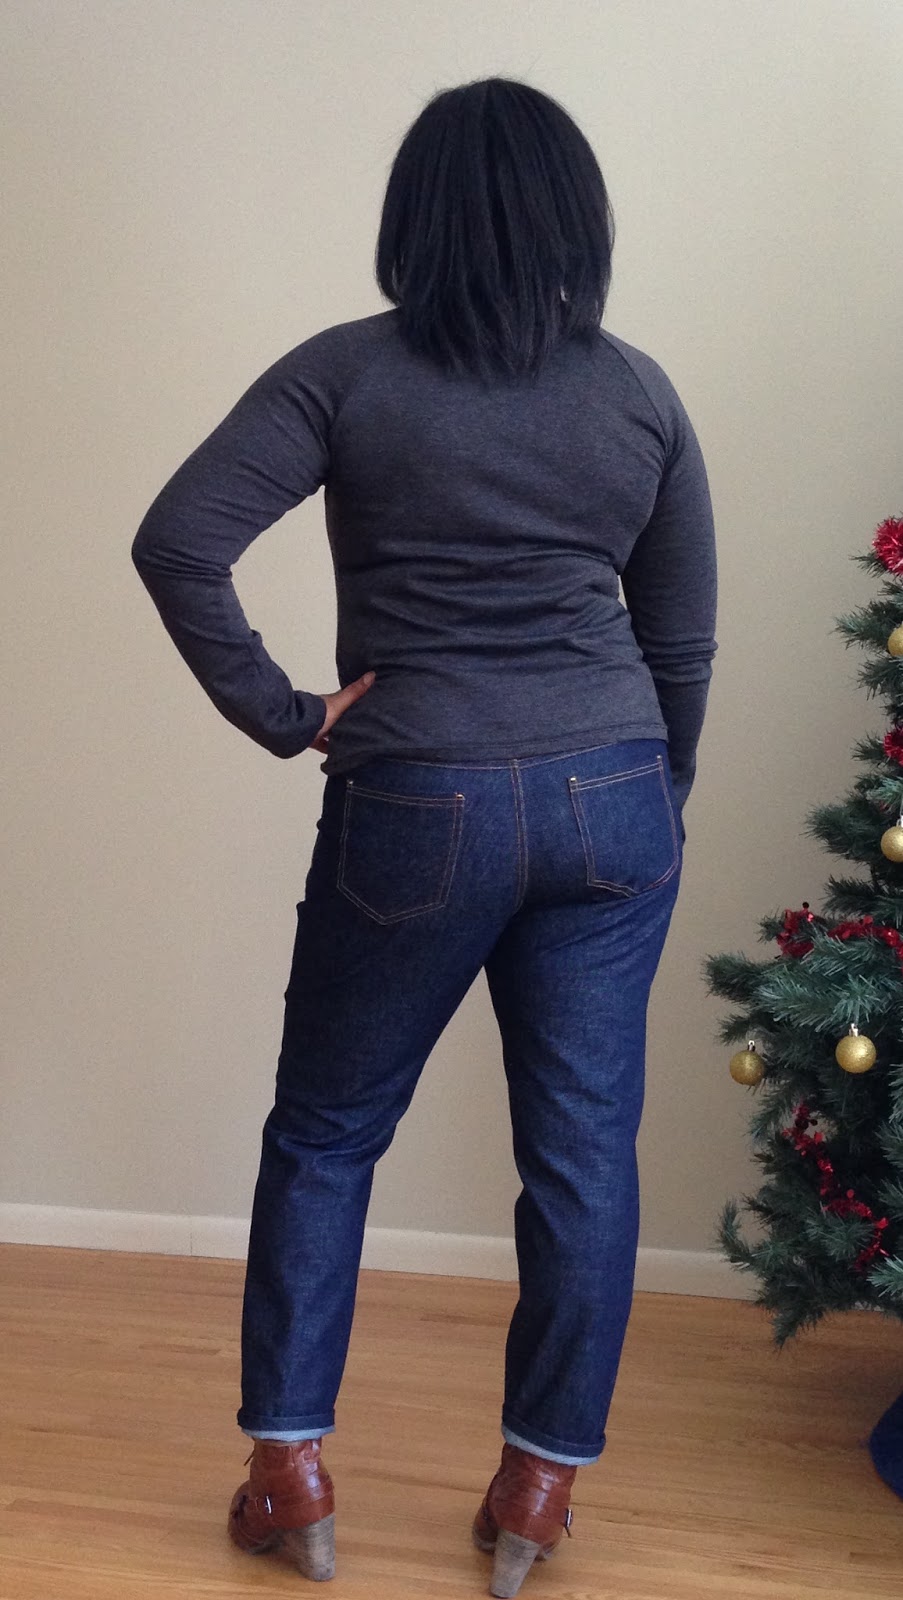
The yoke is too wide. I have about 12 pair of RTW jeans and the yokes are not this wide on any of them. When I put them on, I want to pinch out fabric there. I will make a change for next time.

1cm seam allowances. BUT, I was all ready to whine about it until I noticed my machine has 5, 10, 15 and 20 mm marks. So I could actually sew a 1 cm seam allowance and not go to 3/8"! :)

LOVE everything else. 

Fabric/Notions Used:

Thick non-stretch denim from SR Harris. 
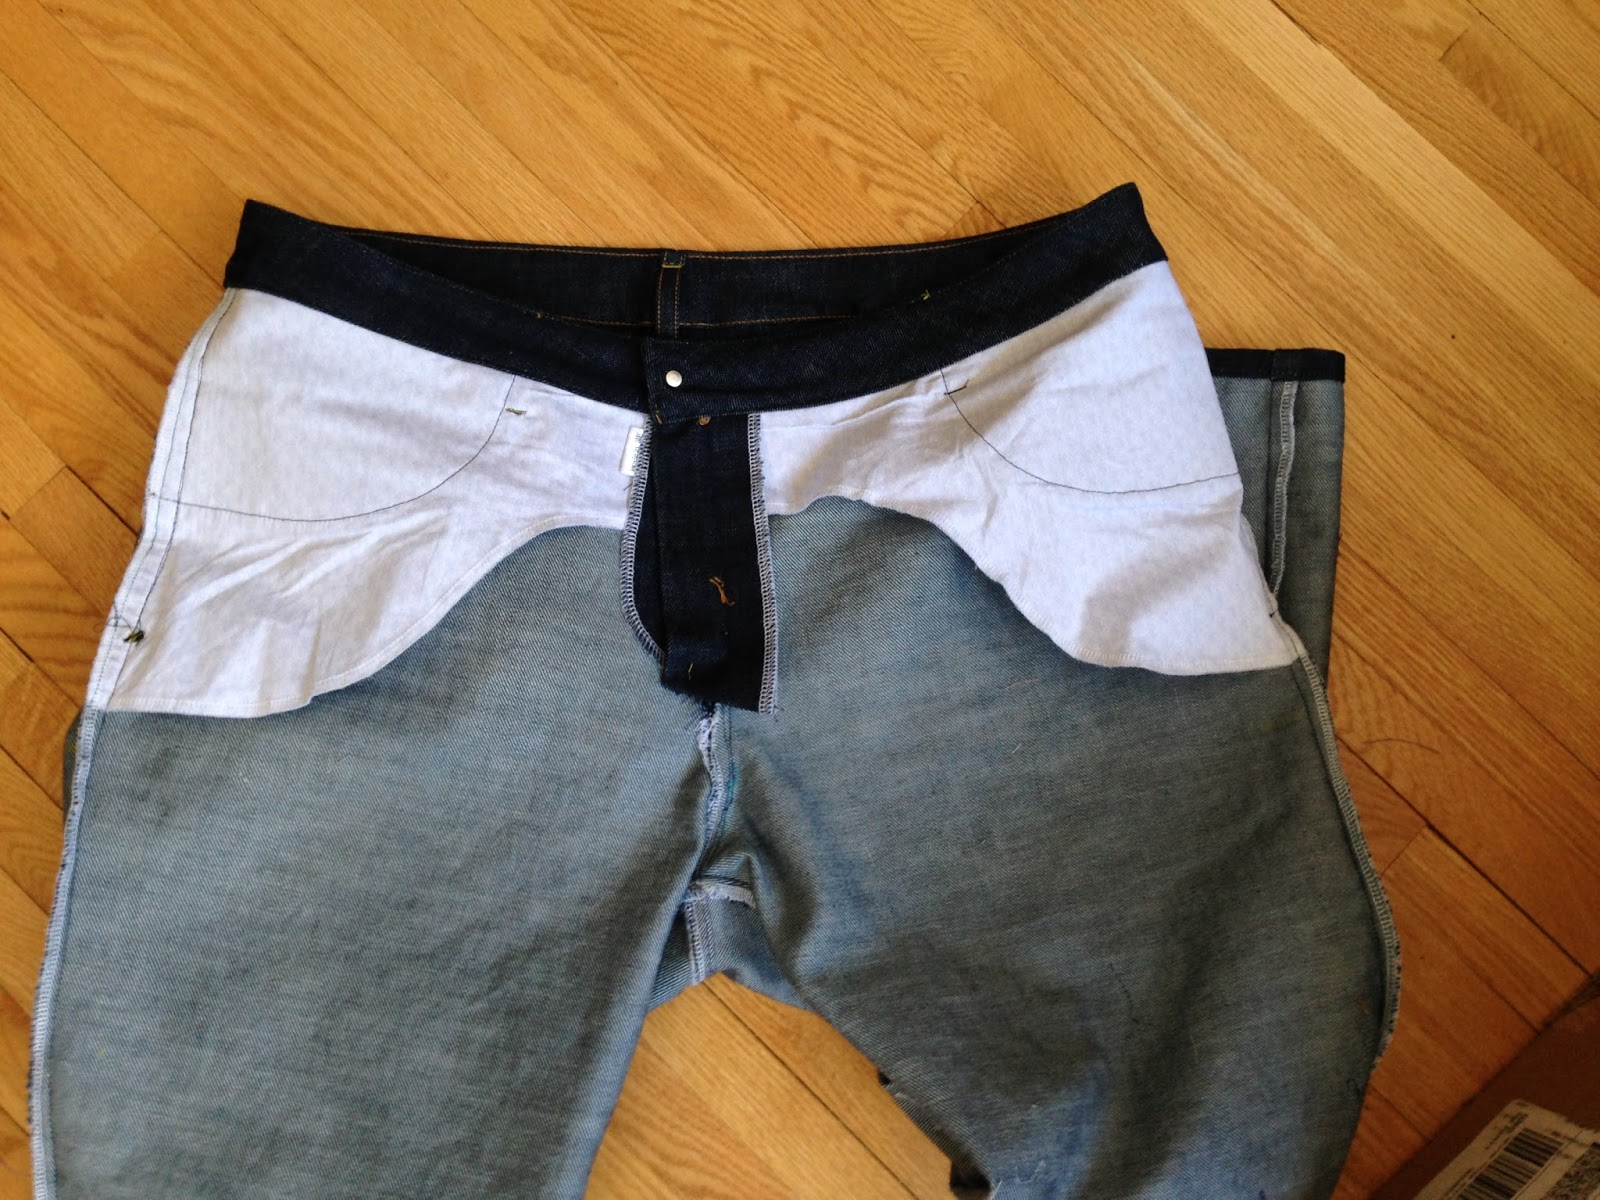
Cotton shirting scraps for the pocket bags.
Blue zipper (not a jeans zipper this time)
Tack button (bought from Hancock during 40% off sale!)
C&C gold topstitching thread
Gutermann thread (in various colors)
White serger thread

Pattern alterations or any design changes you made:

Shortened them several inches (hahaha!), removed excess fabric from sides and back of leg, added to the back rise and crotch extension, shortened the front crotch length, tapered in a bit more from knee to hem, darted out excess fabric from yoke and waistband.


I also angled the fly shield. I know, a tiny change, but I felt it really made them look more RTW. 

I did NOT use interfacing in the waistband. I read the pros and cons and checked out the innards of the RTW jeans that I was using as a guide. Those had no waistband interfacing.

I have had those jeans for about 9 years and they've been my main go-to for work. Sadly the curse of thighs that touch took those to the jeans graveyard.

Changes for next time:

Shorten yoke, shorten front rise just a smidgen, move the pockets just slightly, Make the coin pocket a tiny bit smaller.

Small changes. Small changes...

Oh, and I'll use a jeans zipper and maybe experiment with back pocket designs.

Front view: They really feel great on!


Right side: Some way, some how, my right side is off grain. WOE!  I think I know why though.

When I traced the pattern I was out of paper and used freezer paper. No problem. I cut everything single layer but admittedly had a hard time seeing the grain line on the other side of the freezer paper. 

 Left: Not as helpful as I'm not standing directly in front of the camera; oops. The seamline is straight though! :)


 Back: I like 'em!


And my favorite; the guts!


I am in love with the contrast top-stitching <3


Do not look closely at my buttonhole!


That tack button was easy peasy!!!

Here you can kind of see how close the coin pocket is to the side seam.


Love, love, love the pocket stays.


That is a good looking pair of jeans :-p

As I said in my last post, I am awaiting rivets and will probably show them off when I finish the final item of my mini-wardrobe (black Vogue pants) and get photos done of all the outfits.

You thought there would be NO sneak peeks?!? 


This outfit is so ME. Totally feel like a stylish 35 year old mom in this!


Pattern Review