I knew I wanted to use this cobalt and black and a striped ponte, but couldn't decide on the configuration. I did a screen grab of the line drawing and did a copy/paste into Word, giving me a few to practice on. I sketched out ideas and had settled on the front/drape being striped. But then I didn't have enough fabric! Wah! My second favorite had stripes on the side front piece so I went with that.
ETA 'sketches':


I did a swayback adjustment of 3/4" and shaved about 3/8" from the center back, tapering to nothing at the waist. I always need less room in the upper back with New Look.
I did not need to lower the bust point of the princess seam.
I sewed snaps onto both the left and right front so I can switch it up if desired. I left off the zippers in the sleeve; this is a casual around the house garment and that seemed like too much. However, the sleeves as drafted were short IMO. They too are intended to be bias bound but I ended up adding bands to add to the finished length.
Finally, I treated this more like a woven garment. It was almost entirely constructed on the sewing machine with seams finished on the serger. I also set my sleeves vs sewing them flat.
I was all ready to get started and took a closer look and had a what the heck moment. I did not notice previously that the entire thing is bias bound. OMG! However, that made me happier to go with the cobalt because black binding would pop, and I had 3 packs in the stash. If you have Wonder Clips, this is a great time to use them. I really wish I had some!!!
Because I hate overlapping ends of bias tape (I have silly little things that bother me sometimes), I bound each piece separately, taking care to make sure they met at CB and side seams. It worked fine.

From the right side, I topstitched on top of the bias binding stitching

I left off the binding on the neckline seam
The instructions do give decent tips for finishing corners and ends of the binding.

It came out fairly neat! I should have used matching tread on my snap but duh...Oh well. There's so much volume you can't see it.
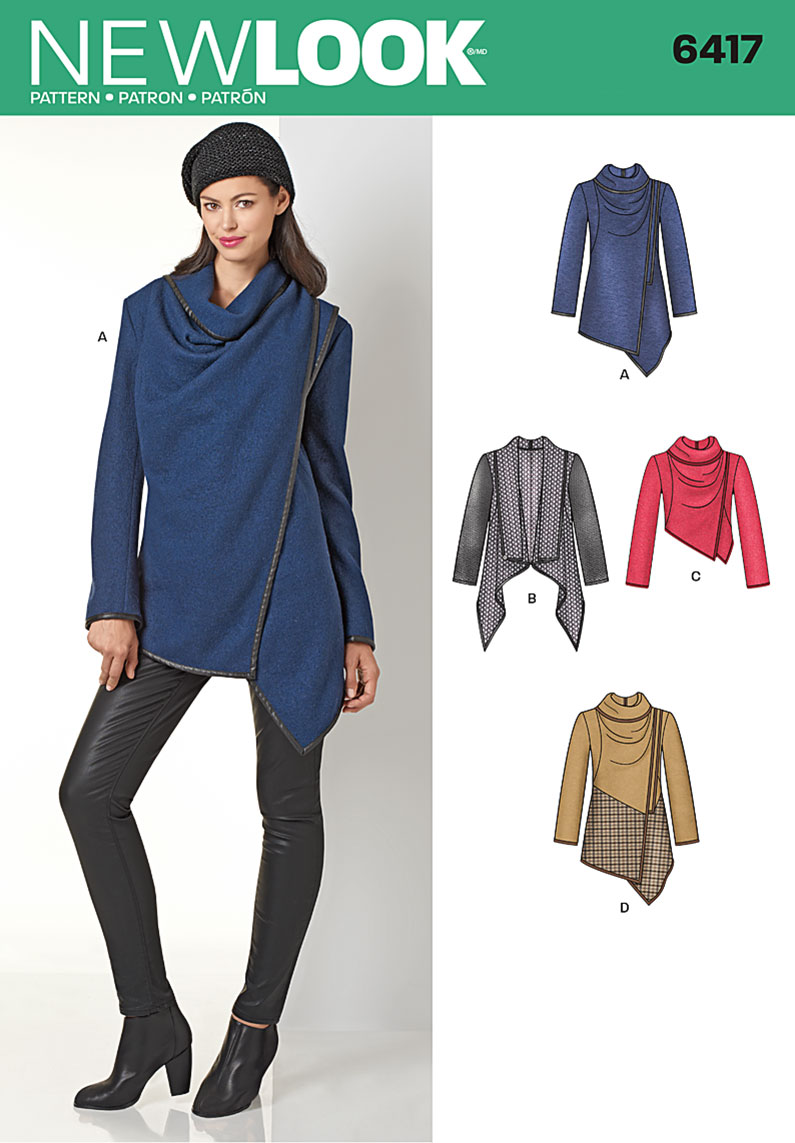
The envelope made me think it was somehow pleated but it isn't...The left collar is sitting like the right and then the right folds over and snaps in back. My right collar doesn't sit perfectly like this when it's on but I still think it's super cute !


I really love this!

I can't get it to look like the pattern envelope at all. I wonder if it's because my ponte is lighter weight

What isn't clear is what you're "supposed" to do with the side that you're not overlapping? I feel like I have to arrange it just so but then it's fine afterwards. Here, I've arranged the collar more like they have it on the pattern envelope.

I know people are over waterfall cardigans but I kind of love it open so much more!!! (I don't know what my feet are doing in the photo to the right! LOL!).
I'm super in love with the color blocking and the stripes. I am not happy that the armhole is SO low. I posted these pics with my hand on my hip so you can see what I mean. But I suppose if the shoulder is meant to be a bit dropped then a low armhole is ok?? I'm still unclear on a lot of the finer fitting points!

I didn't arrange the collar very well here...and my infinitely short back length is showing! :)