Showing posts with label Burda Challenge. Show all posts

Tuesday, October 4, 2016

Burda Challenge 9/2016 #113

Sometimes a plan just comes together!

So far, I have sewn from every Burda issue this year (even October!). The moment this preview was released I was thinking "must make that dress. must." And then the tech drawings came out and it was a surety. And THEN, when I broke my fabric fast, I saw this printed ITY and knew that this would be one awesome dress.

I went with my normal Burda sizing of 40 neckline/shoulders and 42 for the rest. Especially with the skirt being gathered (vs something fitted). I made no other adjustments for fit. Next time (I can see this in black!!), I will take out about 3/8" from shoulder to bust and about 5/8" from the back length.

Speaking of...I'm starting to question if I actually have a swayback or if I just have a short torso. I mean, I know my torso is short, but is that the reason I have issues vs. swayback?? When patterns have a shaped center-back seam, I don't have puddling. And I often find after the fact, that I need to ALSO shorten a bit at the side seam. Same for pants...I need to shorten front crotch length quite a bit, but I also take out a bit at the side seam of front and back to overall shorten the length from waist to crotch. Ahhh...ruminations.

ANYWAY! Aside from wishing I'd taken out a bit of length in the upper bodice (or as a cheat taken deeper shoulder seams), I cut out my skirt rectangles and somehow managed to rotate the front skirt. When I assembled the back and went to put it on my dress form I stepped back and OOPS! LOL! The back was much shorter than the front. That also explains why I knew I'd cut the skirt to match the front bodice motif (mostly) and then it didn't. I just shrugged it off. :) So I have a few less gathers in front than intended. :)

We are heading into fall/winter so my photos will likely get progressively worse :( I don't have a good open area (that's what happens when you cut your living space in half!) and the sun goes down so early during the week. So you'll get to know my kitchen and yellow table well! :)


I ADORE this print and the overall color scheme!!!

The front IS riding up a little. Full bust problems. I'll fix that...


My super cheesy grin says it all! It's Love!

On the black version (whenever I get the fabric for it), I'll add a couple inches to the length. Though, by the time it's cool enough to wear this with the turtleneck and all, I'll likely wear tights with it anyway.

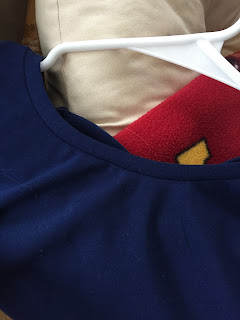
I finished the hems by double turning and stitching with a twin needle. I slip-stitched the collar facing down by hand. The instructions have you ditch stitch but that seems dicey with the type of fabric you'd likely use for this. No way was I going to try that with ITY! I did however attach the facing to the lining by machine. That was no problem. I always do this as a 2nd pass, so I can use the zipper stitching as a guide.

Oh and I did insert a full length zipper but it is unnecessary. A 9" would be fine. I'd also consider using a tricot fusible in the collar. The back stands up due to the zipper but the front collapses a bit.

I started my daughter's dress last night! I got the front and back bodice seams sewn and the front skirt.

 Today I hope to get the back skirt assembled and the zipper in. Then sleeves (they are raglan), skirt to bodice, side seams, neck binding, hem, done! By Friday night! :)


 Lastly, I was on the hunt for fun skirts (still) and dug up some older Burda mags that were gifted to me. ALL of these awesome patterns are from the 9/2007 issue. Burda always gets better with time it seems!  I think the pleated skirt has a place in my fall/winter wardrobe! I have a winter white pinwale corduroy that I think will be perfect.


Thursday, August 4, 2016

Finished! Burda 07/2016 #117

First, here is the shortened Style Arc Susan skirt. I LOVE IT NOW! This length is perfect! I removed 4.5" all around. I opted not to hem because 1) knit 2) full skirt 3) print 4) lazy. I decided that I could always go back and hem if I find the unfinished hem bothers me. It probably won't. Reminder: I cut a size 14, used 1/4" side seams instead of 3/8" and used 1/2" elastic in a casing. I love the movement in this skirt.


My remote died and DD had to take the pics which interrupted couch time :-p Paired here with a simple cami and my latest J.Crew Factory blazer (I bought it in coral and navy and love them! 100% linen and fully lined).

I realized the print didn't "randomize" as much as I thought it would. Oops!

Burda Challenge - July!

I mentioned a couple (or 3) posts ago that I fell in love with this pattern when arianamaniacs on PR sewed it up sans the crazy neck wrap-around straps. And then she pointed out that it's a petite pattern and I was a goner. 


I sewed a 20/21 as per usual -- 20 (40) at the neckline and armholes and 21 (42) for the rest. 

I did a 3/4" wedge on the back skirt piece and a 1/2" swayback adjustment. Next time, I'll adjust the dart position. 


I really love the silhouette. Front bodice and skirt, back bodice and skirt with an integrated side panel. The only issue with this is that the zipper goes in the seam between the back piece and the side panel. It is near impossible to zip it alone unless you're super duper flexible. I'm not that flexible. 


I made one mistake - on regular Burda patterns I never add hem allowances so I didn't add it here. But it's already petite! I'll add allowance next time. Here, I've serged and turned up a 3/4" hem.


Invisible zipper, just to the left of the back strap. So awkward.


Insides are serged. I placed the strap after everything was all done. As you can see, I just topstitched it in place. It works for me. If I were intending this to be a bit dressier I would have added the bodice lining (probably even a full lining) which would encase the strap.

But I didn't want to line the sateen. 


I opted for black bias tape to finish the neckline and single armhole. Works just fine for me to have this topstitched. As long as it's nice and neat (thanks walking foot!), a casual garment is okay to have visible stitching IMO.

On the next version (I think I can own this as an LBD too!) I will widen the strap. I have like 5 of the same bra and placed the strap wearing one. But as you can see it's just too iffy to be sure it covers front and back at all times. On some photos it was covered but on most it isn't. I'll make that an inch wider for full coverage. 

I've had a rough week so I'm now completely unsure about getting the wedding guest dress done. We shall see.

Saturday, June 25, 2016

Burda Challenge May and June!

Well first, a quick photo of my second Style Arc Cara top. I finished the first one and knew immediately that I needed a white one! Really, almost any top you love can stand to be done up a 2nd time in white! :) I also knew it needed to be eyelet! And then I saw this fabric with a scalloped hem at Hancock and had to have it.


It's pretty narrow so while it calls for just under a yard, I got 2 to be safe. I left as much of the other side that I could in case I can find another use for the scalloped edge.

The only changes were to add side seam length so I could use the scalloped edge - so the proportions are a little different than intended but it's okay to me. And I cut the back elastic to 14" instead of the recommended 15.5" for my size.


I still need to hem the sleeves and it'll be ready to wear! I think it's so cute!

I mentioned in my June planning post being unsure of what to sew for May and decided to go with the slip dress as a nightgown. PERFECT pattern for it!

I used a size 40 neckline/armhole and graded to a 42 as per usual. I used a really soft knit that I got in a Fabric Mart bundle so composition is unknown. I added no hem allowance and removed 1" from the hem and then hemmed it at 1 1/4".

One of the views had braided straps and I thought that was pretty awesome. I cut strips, on the crossgrain that were each 1/2" wide. I safety-pinned the 3 together and braided them, keeping my tension as consistent as possible. I then passed it through the back strap, which is stitched down, and adjusted the length in front. They're just topstitched in place and feel pretty secure.


It is extra comfortable and I can't tell you how many times I've worn this to bed. I did a load of laundry just to have it available to me again! Must find more suitable fabrics in the stash!


The braided straps are my favorite :)

For June Burda (and Fabric Mart!) I sewed up this awesome little A-line number in an animal print stretch cotton twill.

Spoiler Alert: I LOVE IT!!!


Read all about it HERE on the Fabric Mart Blog

Tuesday, May 17, 2016

Burda Challenge - 04/2016 #119

Thank you! Thank you! THANK YOU! for the wonderfully supportive comments on my girl's prom dress!  It was quite an experience that was totally worth it when I zipped that zipper up and spun her around! 

Though I've had longer absences from the blog than this, this one was brutal and I had to unplug from everything. Too much life happening but I am definitely in a better place now. Deep breath out...

Onward!

After completing the dress, my next project was supposed to be "quick". But you know me...Because I didn't get a chance to make the dress for the jazz concert, I moved right along to another item that caught my eye. This dress has fun seaming, is fitted, and looked pretty cool in a stripe.

After seeing it reviewed on PR, I knew I had to go for it! 

FYI: To search for Burda on PR you want to enter the date as 04-2016 for example. If you want to look for a specific pattern, like this one, it would be 04-2016-119.


But the striped version!


So for this one, I used a striped ponte that has been in the stash for a couple of summers. Once I received it, I wasn't completely sold on the color. It is absolutely perfect for a casual summer version of this pattern! (stashing works)

Burda is awesome. Mostly because their drafting is usually precise and their sizing is uniform. And they draft for a C cup! I used size 40 at the neckline, shoulders and armhole, grading out to a 42 for the rest. I also did a 3/8" swayback adjustment -- I typically need less with Burda than Big4 -- I could have gone for 1/2".

I used my doubled tracing pencil with 3/8" seam allowances. After tracing the back skirt, I added an additional 3/8" using the pencil (e.g., traced the new cutting line, making it the seam line). 

I should have used my 5/8" pencil! Hahaha! My bottom is a 44 in Burda and this IS a fitted skirt. Whew!

I was having a no-nonsense kind of day so excuse my "over it" expression

The pattern pieces fit together beautifully, cause, Burda. 

I know the prevailing wisdom is that those of us of fuller-body shouldn't wear horizontal stripes (yawn), but I don't like vertical stripes most of the time. So I rotated some pattern pieces because, that's why I sew! Also,  "ain't nobody got time" for zippers in casual knit dresses. So I made sure most pieces stayed on grain so the stretch would be used appropriately. 

Did you see how closely I matched stripes at the waist seam? Didja? :)


Hey, I warned you it was a little "booty-tight" as we say in my house.  I was so focused on matching the side seams of the skirt as best I could that the waist seam (front to back) does NOT match on either side. Oops. 

I decided I was not going to stress myself out during cutting trying to match the darts after stitching AND the CB seam. So I kept it as even as possible so it's unmatched, deliberately. 

The facing is all in one and is beautifully done! It gives a clean finish at neckline and armholes. I had no knit interfacing on hand so I didn't interface. It mostly stays in place just fine except for a small portion in front. And yes, it does bug me a little :/ 

LOVE: 

The overall look/fit, the seamlines, the length, and THE BACK NECKLINE! Swoon. I really like it!

MEH:
I don't love the front neckline. I could have given myself a smidge more butt-room and would actually prefer this with a straight skirt instead of pegged. Pointed out because I was whining not long ago about lack of pegged pencil skirts on patterns.


Worn to the annual band banquet (DD didn't sport handmade this year)

Next up is Simplicity 8138 (to appear on the Fabric Mart blog later this month) and M7386 is cut out and ready to sew. I'm going to try to fit my May Burda in too.

We have a band concert tonight, senior award ceremony tomorrow, orchestra concert Thursday. Beyonce concert next Monday, my daughter is conducting her first concert on Tuesday and we have a scholarship recognition ceremony next Wednesday. Plus I need to get my house in some kind of order before people descend upon it the first week of June for the graduation. And someone should order a cake for the grad party. Bueller? Bueller?

Okay so perhaps my May Burda will appear in June...

Sunday, February 28, 2016

Burda Challenge 02/2016 #121

I managed to get my March Burda done before February...but February was already in progress.

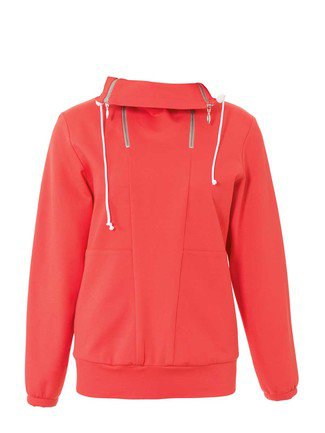
There were a couple of things in February that caught my eye but I'm always on the hunt for comfy sweatshirts (old, drafty house) and this one looked like it would work.
Burda 02/2016 #121 (tall sizes)

I also, for the first time ever, used a tall pattern altered down to regular sizes!

Yay me!

I cut a size 80 (40) and used the Burda instructions (printed in the mag and available here).  Because I never add hem allowance to regular sized Burda, I shortened appropriately and added no hem allowance; and attached the band using a 1/4" allowance.

The pockets are really simply constructed, which I like. But for some reason, my machine was NOT playing nice with this black ponte. I ended up scrapping a pocket and cutting a new one because it wasn't feeding well and the topstitching looked horrid.


I did bar tacks to mark the pocket opening. 
I like the idea but my machine stretched it out quite a bit. I was able to steam it back into place some.


I was stalled for a couple of days because I needed zippers. I've totally given up wasting my time shopping at JoAnn so I was waiting for Hancock to put zippers on sale :) (I know some people only have JA - sorry. I'm so glad they aren't my only option). The pattern calls for 10" zipper and it seems as if the standard is 9" then 12". So I went with 9" zippers figuring that I wouldn't miss an inch on a decorative zipper.

And Burda strikes again. I have no earthly idea what they were instructing with the zipper. Only as I was cutting open my basting stitches did I realize it was supposed to be an exposed (zipper teeth only) zipper. Ah well. I did a good job on my zipper top stitching! :)


The facing extends about 1/2" below the horizontal line I stitched. I didn't want it loose and able to flop around. 


I slip-stitched the facings down to ensure it was nice and neat. I wanted so badly to just topstitch it but wasn't confident at all that I could get it clean so I sucked it up!


Lastly, I've never inserted eyelets so I went with tiny buttonholes for the cording to come through.

I had planned on making the entire thing grey, then decided I would make the pockets and collar black and then felt I should do either the sleeves or the bottom band in black. 

I ended up deciding on black sleeves because I really scored on this grey ponte! It's such nice quality!!! And I decided that I would make this (1 yard) skirt with it so I wanted to preserve as much as possible.

Now, I was searching and searching for the rest of my black ponte. I'd cut the pockets and collar from a remnant. And I "found it" and cut the sleeves. Yeahhhhh that ponte was different. Not as thick, obviously more poly than the other, and with a very slight sheen.  I was worried it would change my opinion of the finished garment but so far, not so much.


I'm fairly certain the collar depends on the fabric and the black is drapier than the grey on mine so it looks best fully zipped and then folded over. I forgot to shorten the cords but will do that.

The *only* thing I don't like is how wide the cord ends up sitting. If I made it again (which I may, because I love it), I would narrow the very top of the center part to tighten that collar up some.

I didn't sew at all on Friday or Saturday and just HAD to get in there today, but didn't want to work on anything too complicated.

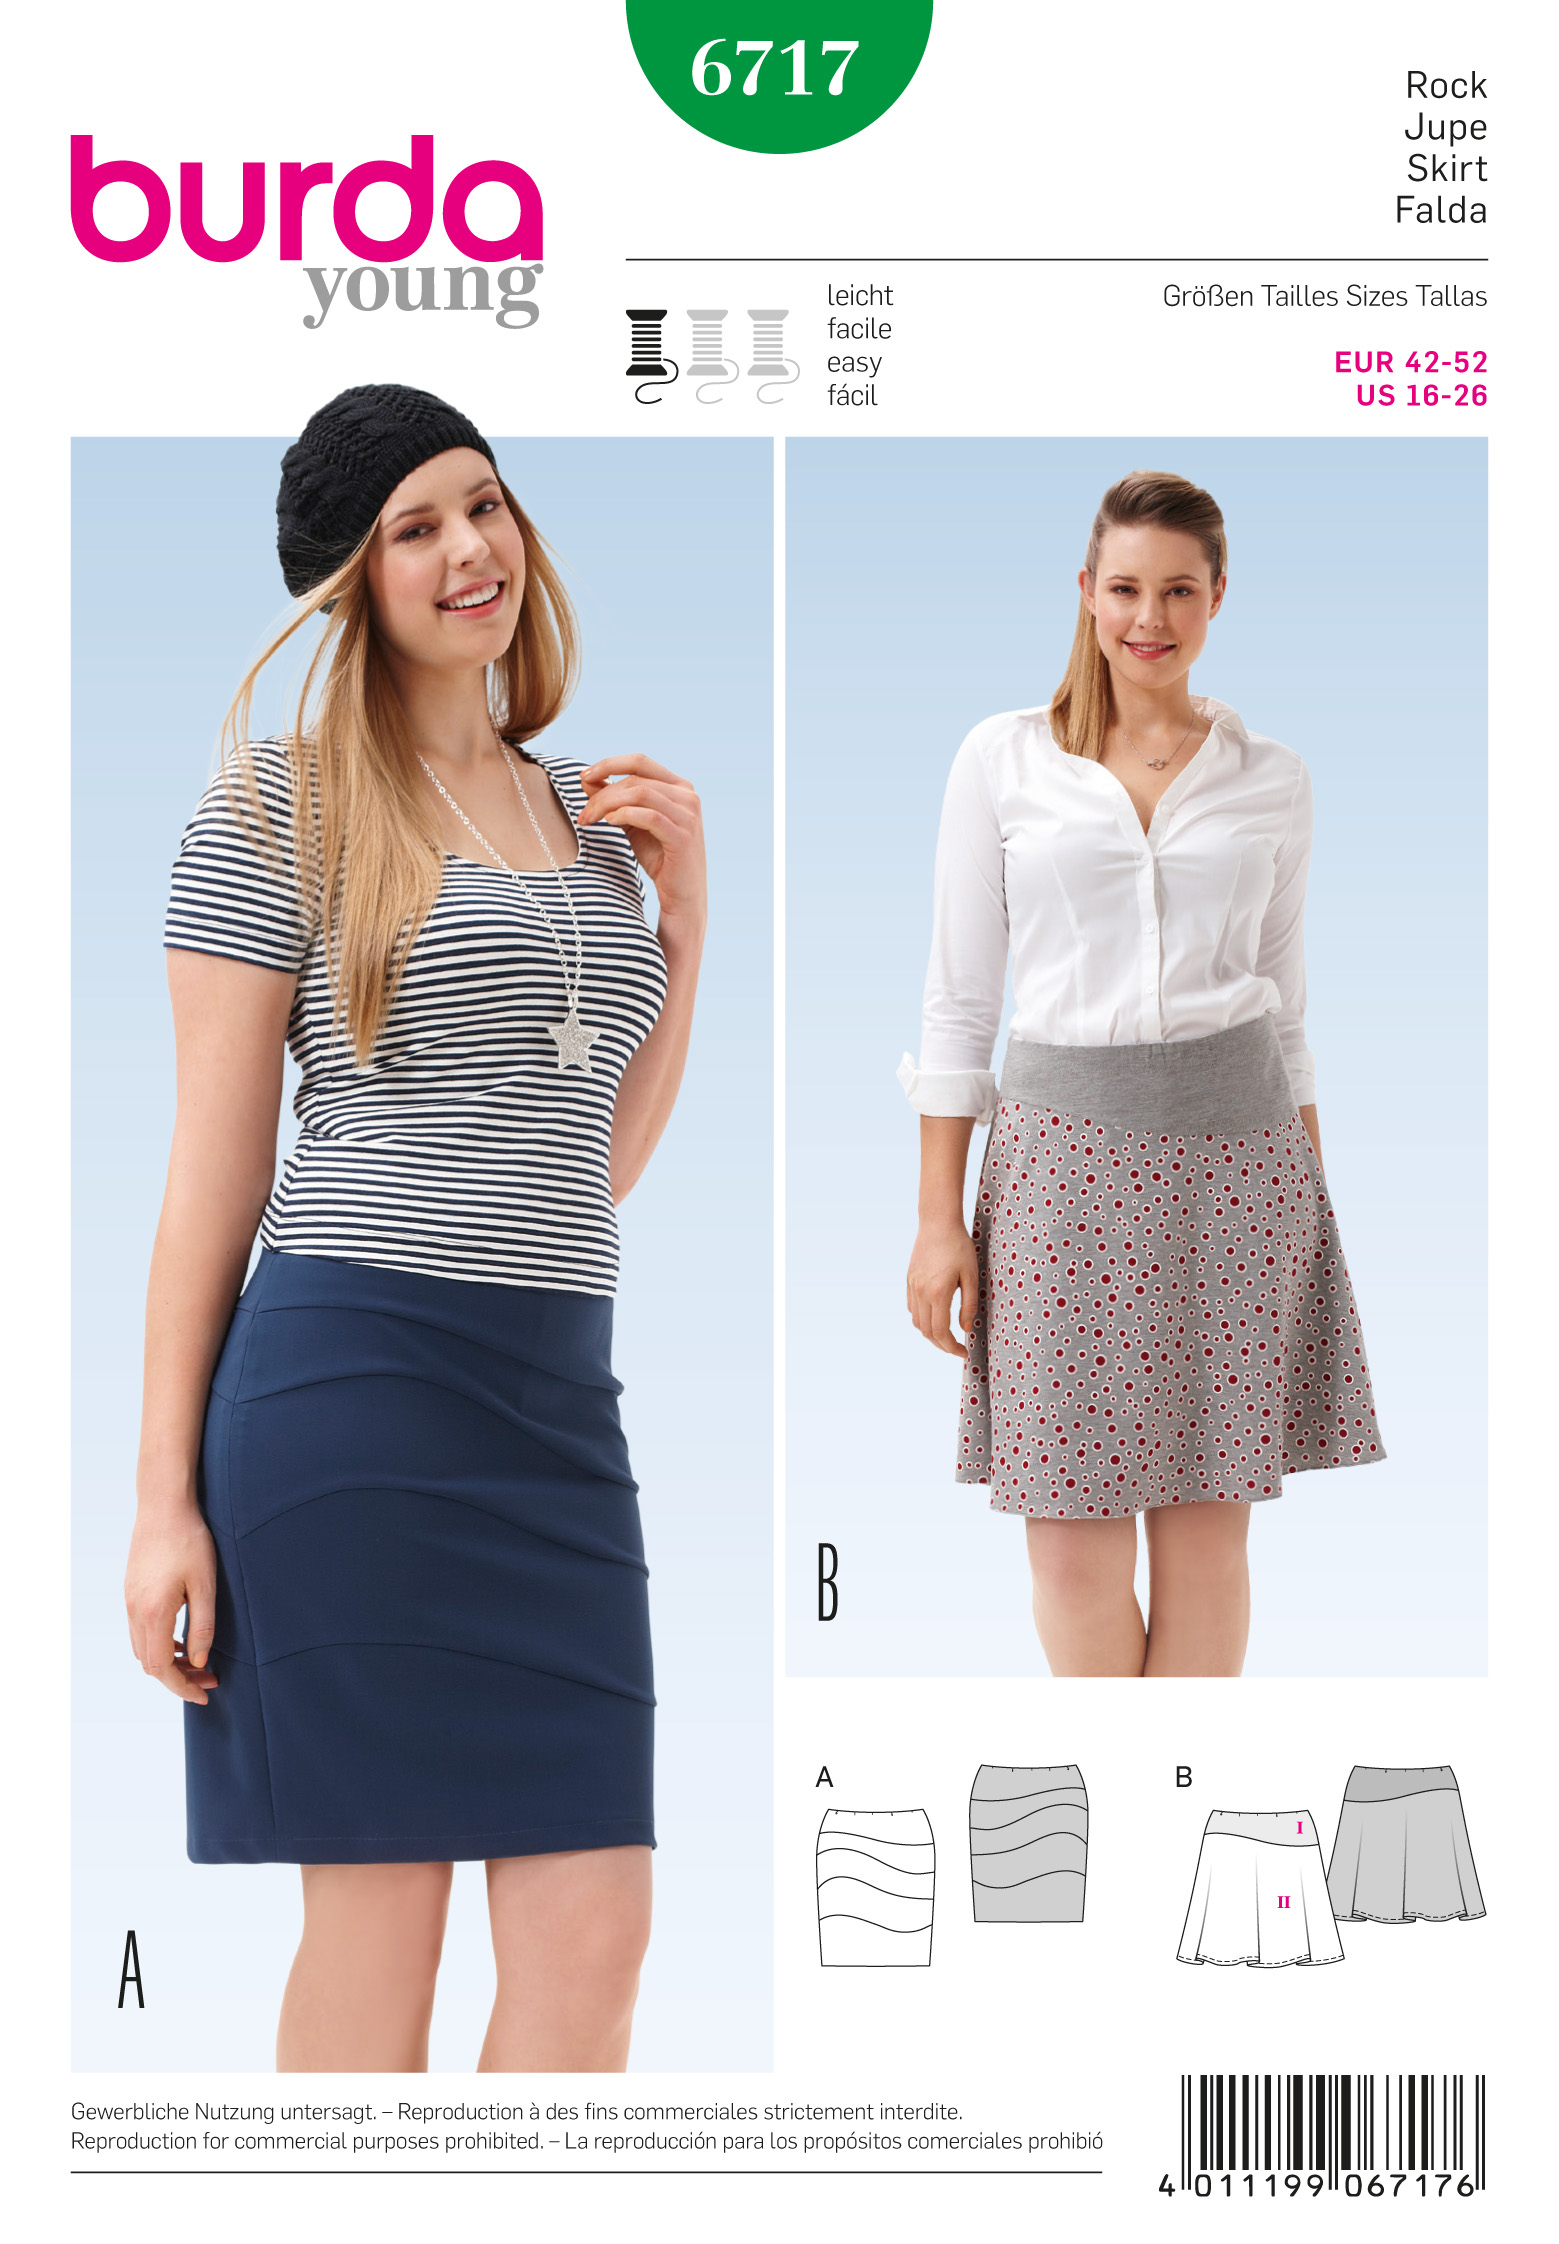
Enter Burda 6717, scooped up at the last Burda sale. My Hancock gets the new Burda's in and always have JUST 1 of each. It's crazy. So a couple things on my list didn't make it, but I browsed the book and decided I needed this pattern.


This is a Burda young pattern that comes in size 16-26. I cut a size 18 (typical for me). As I mentioned before I never need hem allowance on Burda and I cut off the entire 1 1/4" hem allowance and hemmed it 1 1/4". 

Important to note, the front and back is the same. If for some reason I decided to make this again, I'd have to widen the back only as it's a bit snug. 

It's 5 pattern pieces, numbered 1-5, top to bottom. Super easy. Zip, zip, zip on the serger, hem, elastic, done!


I really like the waistband finish! They have you sew elastic and turn inside. Now, they tell you to hand stitch, I have no time for that. Because my elastic is very wide (2 or 2 1/2" I don't remember...it's left over from my Minoru), I just pressed it and it stays in place just fine. And SUPER comfortable!!! The elastic is inserted 1:1 so no complications there.


Ab.So.Lutely ADORE this outfit!

And of course, both of these items work extremely well with the rest of my wardrobe.

Lastly, my February post is up on the Fabric Mart Blog!! Check out how I used this fantastic Maggy London border print cotton jacquard!!


Tuesday, February 23, 2016

Burda Challenge 03/2016 #118

I have been a little preoccupied with life things and haven't been around blogland much. So thank you everyone for the lovely comments on my Burda pants and Butterick skirt. I've worn the pants already and love them. And cannot WAIT to wear the skirt! It snowed today so...maybe in a little while. :)

So, Kathy posted things from the March issue that she was digging over on Instagram. Confessions of a Sewing Novice then mentioned she liked this weird top too. And whaddya know, I was feeling the same way about the odd little top from the March issue! So we made a pact to sew it up and here's my contribution to #teamtrashbagtop !  [See CoaSN version here]


I know. I looked at the line drawing and thought, "Oh, Burda"

But then I had to agree with the other ladies that even Burda's rectangle patterns just...work...so I went for it!

I used this Maggy London striped jersey that has been hanging in the stash since last summer (Fabric Mart of course) and traced a size 40. 

This pattern is so quick to trace and sew. It took me 90 minutes to trace, cut, sew and take photos. Win.

While I didn't bother to try to match stripes when cutting, it worked out pretty well when sewing. The pattern is intended to be left unhemmed and that's okay with me. I cut with my rotary cutter for a nice, crisp edge and did a little zigzag to tack the serged seam allowance. 


I kind of love it.


The front drape is made by taking 2 tucks. The cowl has a wonderfully drafted facing.


The back is voluminous but IT WORKS!

Cute and casual and my stripes mostly match! :)

My February Burda project is in the works. I have to run by Hancock to get zippers tomorrow and that should be wrapped up by weekend. I'm committed to the Burda Challenge this year! 


Friday, January 15, 2016

Burda Challenge: 01/2016 #103C

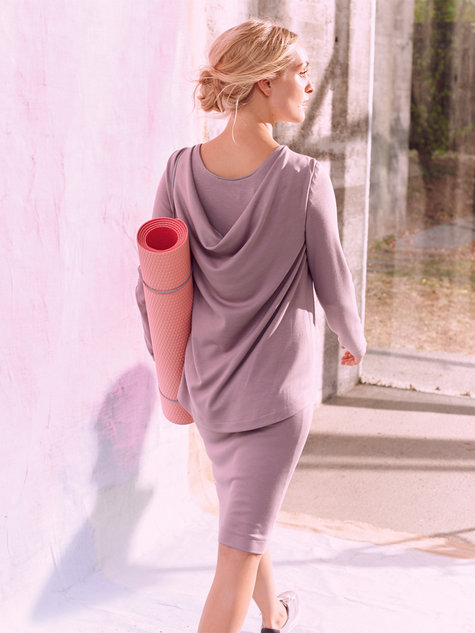
When the preview for January was released, this dress caught my eye immediately! 


I was uncertain about whether or not I could pull it off...even though it's intended as a casual garment. I tend to stay away from things that are too oversized or too bulky. But I couldn't stop thinking about it! :)

And that Fabric Mart romp when I finally broke my 4+ month fabric fast? I got a lovely cotton-lycra knit in navy! That made me excited to sew the pattern AND nervous -- this fabric is so awesome (it's sold out, and I wish I'd gotten MORE). I didn't want to potentially "waste" the fabric on this pattern. But of course, I went for it!

As I normally do with knits with Burda, I cut a 40 neckline and armholes and graded to a 42. Except I did this on the tank dress but then cut the overlay a straight 40. Oops. It's a little snug across the chest and smashes the bust down a little.

BUT I LOVE IT! haha!

This fabric would have made a fantastic pair of yoga pants and as such is a little bulky where seams intersect, etc. I had to make some adjustments:

I did not turn the bands to the inside as intended on the front of the overlay and the entire neckline of the tank dress.


I didn't sew the tank and shirt together at the armhole and instead did some hand tacking at the shoulder seams (this keeps it in place just fine).


I did plan on just leaving them separate. But the weight of the fabric and the fact that the overlay is technically smaller than the dress..it was shifting around.

But another reason...the tank is a crewneck and no thank you. I like the fit of it though and maybe I can scoop the neckline for something wearable on it's own.

Because it's winter in MN and I work during the day...sort of crap photos ahead!


I cannot wait til spring as I will totally run errands in this! I love the draped back so much!!!! SO MUCH!  I love how it's intentionally slouchy!!

I did a serge-and double turn-hem on the cowl


And serged and turned up once hem on the top, dress and sleeves


And I made another mistake! I never add hem allowances to the regular sized patterns but I did want to on this one because I liked the longer length! And then I forgot! grrr!
Totally fine with boots (and tights and boots, I'm sure), but I like it sporty. Either with tennies or flats when the weather warms up. You can also see here how it's a bit too tight across the bust.

The only downside to this luscious fabric, by the time it's really warm enough for bare legs and sandals, it'll probably be a bit too warm to wear. I can totally see remaking this in a lighter weight jersey or doing a solid dress and print overlay. Ahhhhh.


The outtake :)

So yeah...this one is a win, despite it's issues. And I laughed at myself thinking how the last two items were executed fine and fit fine but were "meh"...but this one has something wrong here, here and there but I am smitten! That's just how it goes.


A sneak peek of my next project. I've never done flat piping before. 
What a fun little detail to add to a yoke!


Meeting up with the MinneSewTa group tomorrow; check us out on Facebook if you're local!

Until later...!