(I broke it down to photos, construction, fabric)
Oh yeah, this week's garment fought me...but I emerged victorious!!
PHOTOS
We found out on Monday that the deadline for submission was bumped up a bit. At first I was all...eh...but then I realized, HOLY CRAP this means I have to get photos Monday evening after hemming it!
So I am not happy with the quality of my photos. I took over 100 and chose those that best show the details of the dress. Ok except for the first one here on the left... lol! It is dark but it's my favorite pose!


I LOVE IT!!!

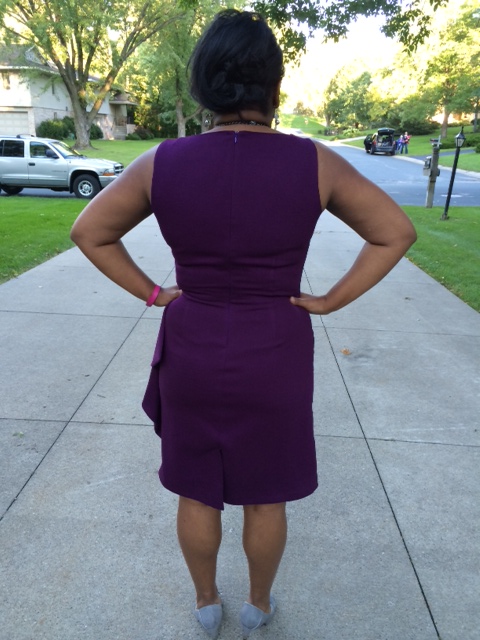
it's a wee bit snug across the back waist/butt. Dang it. Not uncomfortable and I was able to sit and bend in it! :)
CONSTRUCTION/FIT
When we got the challenge and learned that it was a fitting challenge, I went through about 82 options in my head in about 90 seconds, flat.
My first choice was to make another B6104 jacket since I want one that's more traditional with the lapels and in a pretty tan/brown wool that I've been hoarding for awhile. I had my red one as a "wearable muslin" and knew what adjustments to make. But then I decided I should push myself and do something I've never done before.
>see where this is going?<
I decided I was (finally!) going to tackle a lined sheath dress.
According to the pattern stash feature on Pattern Review, I have 72 dress patterns (that includes casual dresses...knit dresses..but excludes dresses in a wardrobe pattern). Vogue was on sale at Hancock this past weekend and I was *this* close to buying a new pattern. But I didn't! I have 72 dress patterns!!
Last year I was all set to make New Look 6123 as an anniversary dress. I got discouraged by the pattern pieces (hahaha!) and after tracing them off I put them back in the envelope.
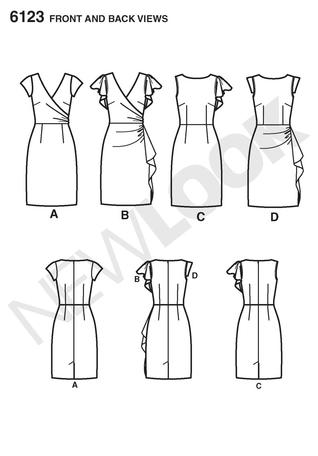

There are TONS of cute versions of this dress all over. The only thing I began to fear was the fact that so many had made this in a ponte. Now, this weeks challenge did not require a woven fabric but I knew I wanted to use a nice wool and started getting scared to fit it.
Because it's my new thing (ha!) I made a muslin. It looked pretty good but of course, some changes needed to be made.

Edited to add: Pinned out excess on the left side, right side still has the extra fabric.

There was too much fabric from shoulder to bust, and too much at center back. However, I was fooled into thinking the skirt fit well! I made changes to the bodice and made a second muslin of the bodice only.

Front pieces: narrow shoulder, armhole gaping adjustments

I ended up "phoning a friend" to ask how to take out the extra fabric at the armscye and she told me "take a tuck" is what people usually do. I then found a handy tip for rotating that into the bust dart - GENIUS!
(Sorry, I never remember where I find these things. I swear I'm going to start writing it down)
Basically, once you "take the tuck", you make it a dart. Now, you could totally leave it as a dart or you can rotate it into the existing bust dart. You slash the lower dart leg on both darts and close the armscye dart. This leaves a funky looking armhole but you have to just fix the curve there.
After doing the 2nd bodice muslin I realized I need to lower the armhole a tad and move the dart point back about 5/8". I did not muslin again, I just made these changes. Ooh, on the second bodice muslin I also added the flange sleeve and decided it was too much on this one.

I often add a wedge on straight/pencil skirts. The sharpie note is reminding me to add to the side seams next time as I need a little more width in back as well.

3/4" swayback adjustment, narrow shoulder adjustment and I shaved off 3/8" from the upper back tapering to nothing near the waistline.
WHEW!
I was trying to do nice construction here and I interfaced the 'bias' line of the front pieces, the zipper area, and the hem.
And I decided to line it.
Did you know that lining a sleeveless dress is a 'thing'? EEEEEK!
I spent a good 2 hours scratching my head and staring at the pieces and reading 813 tutorials and watching 1,288 YouTube videos.
In the end I decided that it's impossible (yes, I decided that it is impossible) to to a "normal" full lining with the crossover front bodice.
((If you can tell me what I SHOULD have done, please do!! I want to make this again, sans flounce, with sleeves as my LBD))
I was frustrated and near tears and the people in my house made me take TWO breaks! haha! So I mostly lined it and then treated the side seams like underlining and serged them after sewing.

Interfaced neckline - sorry about my bra on the floor! lol!
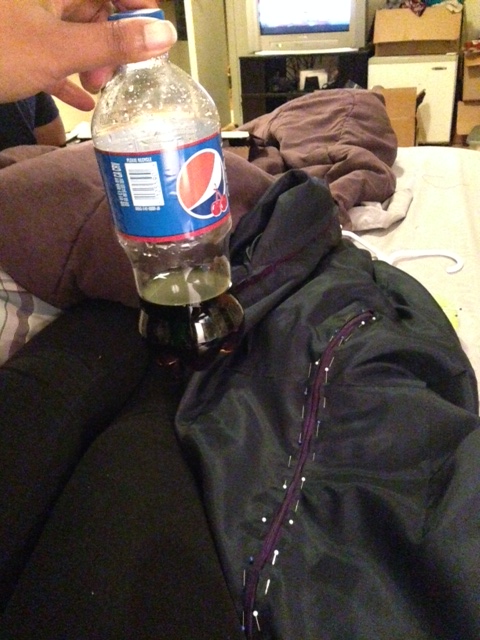
Ok, I took this pic to prove to my friends that I almost drank an entire pop!
But this also shows the process of hand-stitching my lining to the zipper tape.

I followed Fashion Sewing Blog's tutorial for clean finishing the bodice. I lined and understitched the fronts and backs, leaving the shoulder seams open. I then pulled through and stitched around the lining/fashion fabric pieces, and when you pull them out - tada! You have nicely finished pieces! Obviously you can't complete understitch here so I went as far as I could and pressed the rest into submission.

It's not maroon or bright purple; promise...
The front has 3 pleats going down and then the skirt has 3 pleats going up. But, the skirt is ALSO gathered. It's a very flattering effect.
And, I did my first ever vent! And with a lining! Another moment to almost cry and another HUGE thanks to Colleen of Fashion Sewing Blog for a great tutorial!

The hem was interfaced, serged (I didn't know if I was "supposed" to do that or not) and blind hemmed. I am getting pretty dang good at blind hemming!
A nice invisible zipper! And an almost perfect matchup of back darts and waistline across the zipper!
FABRIC
I knew I did not have anything in the stash that was a solid color and that would be suitable for this dress AND that wasn't black.
Since I had my awesome-sauce meetup planned at SRH, I decided I would buy wool crepe. Yummy delicious wool crepe. It's an eggplant/plum color and of course, it was wonderfully amazing to cut and press and sew.
I pretreated in my dryer with steam and everything went fine.The lining is Vera Wang acetate from FabricMart, purchased well over a year ago (GO STASH!).
Fashion Fabric (2.5 yards at $11/yd) = $27.50
Lining Fabric (2 yards at $1.99/yd) = $3.98
Thread = $1.80
Zipper = $2.25
Total: $35.53
Now, some of you may laugh (go ahead, it's okay), but this is the most expensive project I've ever made!
It was difficult but super rewarding. I think I spent 12 hours on this dress. TRULY the most expensive project ever! :) But I am proud of it and I keep touching it and wanting to try it on because it makes me happy!

Yeah, loving the flounce!
So, I will be wearing it with this necklace and shoes (that I wore on my wedding day!!) for our anniversary in 2 1/2 weeks. Yay!! (for more reasons than one!)...except my hair will be done, I won't have sock marks and I won't be wearing my pink FitBit. Cool? LOL! :)
See all 7 entries (somehow 3 of us made purple dresses!!!) and vote HERE
VOTING IS OPEN THROUGH THURSDAY!
Hopefully I'm your favorite, if not, don't tell me, just smile and nod. LOL!!!!!