Showing posts with label Wardrobe Contest 2015. Show all posts

Wednesday, May 13, 2015

DONE! Pattern Review Contest Entry

Sooooo uhmm, remember those plans I uploaded before? Yeah...Never mind those.

In the end, I took out all the things I've sewn since April 1st and spread them out. I started putting together items I thought would work best (and of course that filled the contest requirements of 4 tops + 3 bottoms where all tops match all bottoms, and 2 sewer's choice).


I am very happy with my final wardrobe!!! It took an eternity to take all the photos but I am digging this wardrobe/SWAP type sewing. I want to sew all the things but I want to actually WEAR the dang things! :)

I really wanted a white piece and decided I didn't like the Burda kimono top as much as I thought. It just isn't 'crisp' enough for me. We'll see if I can make it wearable...I was *this* close to sewing a white jacket or vest or cardigan but seriously could not muster up the energy to fiddle with one more pattern. Just COULD NOT.

Since I'd been raiding my UFO box; I pulled out the navy wool jersey M6996 cardigan I cut back in January, which was pinned together in some places but still unsewn. Whipped that puppy up today as one of my "premade" / sewer's choice items. I love how well the dark navy plays with other items!

I named my wardrobe "Work Hard, Play Harder" because I really want to get my wardrobe working well together. I don't mind having some items that are exclusively 'work' or 'play' but I wanted to have a bit more cohesion and I think that I accomplished it!

Here are my combinations; you'll notice some are 'missing', but I only put together outfits that I would ACTUALLY wear.

For the dress there's obviously two options; dress alone plus dress with cardigan.

Since I know I wouldn't wear the loose, floaty NL6110 top with the straight skirt and it's too voluminous to pair with the cardigan, I eliminated those options.


For the grey top (Buda 6911); while the cardigan worked with the black skirt with the other tops, the navy, grey and black did nothing for me together, so I eliminated that option


 For the black/white striped top (M6839):


For the animal print top (M7094):

All of the items have been reviewed here on the blog; I've made M6996 a couple other times so I'm sure there's a review here somewhere :) I cut a size medium. The end :-p

McCall's 6839, Burda 6911, Vogue 1411
McCall's 7094
Style Arc Sandra

My fave looks:


Thursday, April 23, 2015

PR Wardrobe Contest: Style Arc Sandra - Take 2

Sorry you have to see me posting so much! :)  I have been sewing a few hours a day which is much better for me than epic sewing sessions. I still love a quick project but these types of items that can be broken down are appealing to me more and more.

Anyhow! I started these Sunday night; cut out some of the smaller pieces and on Monday, really started working on them. By Monday night I had the pockets stitched and ready to assemble, the parts that needed interfacing interfaced, and the belt loops topstitched.


It is worth it to note that I cut the main pieces all single layer (saved the grainline AND my hand!). I had traced this pattern onto freezer paper last time and it is NOT see through. I had a twisted pant leg and didn't want that to happen again. So instead of flipping the pattern piece, I flipped the fabric! I cut a front and back on the right side, flipped the fabric and cut them each on the wrong side.

I saw a handy tip about tracing the pattern piece rather than cutting around it and that helped a ton with accuracy. I used chalk on the face of the fabric and a pink gel pen on the wrong side :)

Tuesday I got the front and back completely assembled and ready to baste together.


the FITS I had topstitching that fly. Holy cow!!!! I thought I was going to cry I had to unpick and re-do so many times. BLEH!!!!!!

I again chickened out on using a jeans zipper and again that freak out was unwarranted; it is completely concealed. Also, this denim is quite light so a normal zipper works fine.

Wednesday, the jeans were completed except for hems, belt loops and button/buttonhole (dang that doesn't sound completed at all!)


I got out my tools (and my husband!) to practice rivets.


That bottom one that is all bent and mangled? Too much hammering!

The other two caught just fine but then I realized the areas where I am placing rivets is NO WHERE near as thick as this stack of denim I practiced on! Maybe half the thickness...maybe. And Mr. SCC couldn't find his Dremel tool or a side cutter to shorten them. So for now, I am rivet-less.

My machine does a MAR-VUH-LUS bar tack! YAY! And again, lighter denim, no problem attaching belt carriers. But the buttonhole. Sigh.


I practiced! The second one was GOOD!

And then I started on my fabric. Well...my machine has auto buttonholes and there is a lever that comes down which "tells" the machine how long to make the b-hole. This was right up agains the bulk at the waistband (where it meets the top of the pants), and the feed dogs couldn't feed it.

75 minutes, lots of stitch ripping, lots of sadness later...

I turned the pants so the majority of them were to the right and the top (thinner) part was against the lever. Ah. Problem solved.

Wonky b-hole this time but at least now I know.


Also worth nothing that while I can get a crisp corner on trousers, so far on jeans? fuggedaboutit.

*Denim from SR Harris
*Random stash scraps for pocket bags
*C&C topstitching thread in 'gold' and matching all purpose thread in bobbin
*On pair #1 I did not interface the waistband which was fine. This pair needed the waistband interfaced. So I presume after a wear (hopefully 2) I will need a belt or to wash them to restore the fit.
*Dritz tack button
*14 universal needle for construction (lightweight denim...) and topstitching needle for...topstitching! :)


Oooh and I did pocket "designs"! Okay, it's 3 parallel lines but still!!


I think they look pretty danged good!

Innards


Slightly different from pair #1 (on bottom)


I call this photo: Smug Satisfaction

Until next time!!! Oooh and if you have a favorite denim source, please link!


Sunday, April 19, 2015

PR Wardrobe Contest; Vogue 1411, Burda 6911, McCall's 6839

I was veering wildly off track for a minute but pulled it together!

Last I mentioned, my wardrobe was this:


M6996 did not pan out and I still need to finish the M7121 dress. I sewed M6969 jumpsuit instead.
S1916 was replaced with M6839 and V9032, while still being sewn, will be replaced with B5760 in black.

So I still have to make the skirt and the two most complicated items; the jeans and jacket. If I start the jeans tomorrow, they should be done by the end of the week. [I have been spending about 2-3 hours job searching (ok, the first few days was seriously just updating my resume/cover letter. What a CHORE!) and 2-3 hours sewing. ]

And then a quick muslin of the jacket and I should be done with my wardrobe before April is up!

*****************

Burda 6911 was just made recently, blog post here. This time I used an icy grey rayon jersey from SR Harris. I still couldn't figure out a dang-blasted FBA on this pattern! I studied it and studied it and was like, whatever. I sewed all seams as 1/4", shortened the top 1" and used a 1.5" hem.

Dear Burda, how long do you think we are?!

I shant complain. I am sure taller ladies are having to lengthen much more often than I have to shorten!


I didn't have a ton of this fabric (kicking myself because it's awesome!) so the sleeves were chopped according to remaining fabric.

*****

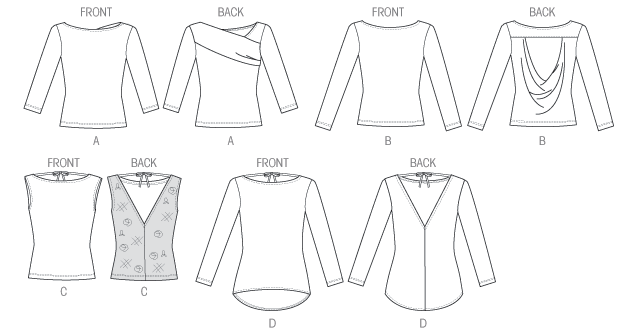
Next, I sewed McCall's 6839. I really loved this pattern when it came out but never really thought to sew it.


I sewed view C and was all prepared to need to add length to it because it "looks short". But the back length is 23 3/4"!

I thought this would make a fun summer top and the front boatneck allows it to be work appropriate too with a jacket or cardigan.

I sewed a size 16 which has a 39" bust, so just a tad of negative ease there. I could have graded out below the bust or sewn smaller seams because it fits snugly through the tummy and hip too.

LOVE the neckline - front and back!

Dislike how they had you attach the ties. It just isn't clean. Also a little iffy on the positioning of the ties but that could partly be due to body type (slanted, forward, narrow, broad, etc shoulders).

Chopped off 1" and did a 2" hem.

I would sew the a longer version with sleeves as a fall tunic. Really like it. Also, this jersey is fairly lightweight but those ties still got bulky. I will keep that in mind for next time.

*****

I wanted to start my jeans SO BADLY on Saturday but my hands were hurting and I didn't want to aggravate them. I cut V1411 instead. This is my 3rd pair :)

When I got this fabric I was crazy about the feel of it but not the color. I was actually going to make a hoodie for my son with it but then he asked for red shorts instead (which I still need to make. shhhh).

I decided to leave off the top stitching this time and I added 1" to the length. I still ended up with 5/8" hem allowances. Sigh.

Based on the fit of the other two pair, and the fact that I was using 1" elastic, I sewed the waistband to the pants with 3/4" seam allowance and sewed all seams at 5/8" (last time I think I sewed smaller side seams).  I also cut my elastic about 1.5" smaller. All seams were sewn on the sewing machine with a zig-zag, pressed open and then serged and pressed to one side. I stitched in the ditch on the side seams to secure the elastic and again left out the crazy tip about elastic at the crotch seam. No thank you. I HATE that in the burgundy pair and decided today I'm going to unpick it.

These feel nice and snug without being tight and I really, really like them a lot!


They look really cute with the black/white/grey (and combos of the three) tops in my closet. Also very cute with my Butterick moto jacket!


This is the face you make when you see forest creatures in your back yard while taking pictures. I am a city girl. C.I.T.Y. How I came to live so close to wildlife is beyond me.

One important thing to note...when I first sewed these last year, I was sure that I had made some sort of mistake. Now, I am fairly certain that there are notches that don't match up on the some of the front leg pieces.

Friday, April 10, 2015

PR Wardrobe Contest: McCall's 6969

THANK YOU ALL! I big sincere thank you for the outpouring of support about my job loss. I am surprised but not. Sad but not. Excited about what may come next but annoyed at having to search and interview again.

I did start on a skirt suit today using M5523 as the bottom and will muslin S2446 next week. I decided to take these days off as mental health/sew days and Monday morning I'll be up and at it, getting my resume updated.


I'll get those pleats worked out. LOL!


***

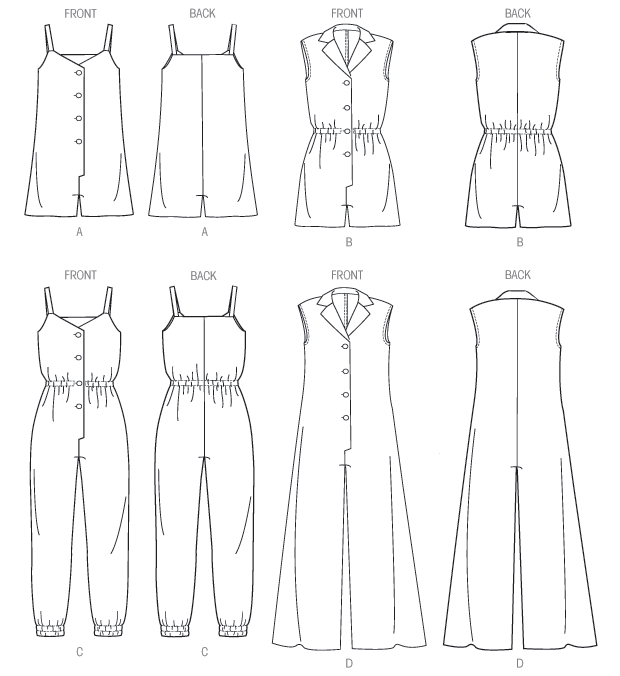
Because my M6696 shirtdress was looking like a fail (maybe I'll post the muslins when I go back to it). I decided to use the chambray for a jumpsuit instead! It's lightweight but opaque and stable enough to not give me a headache during sewing.


I used view C because I don't like A and view D realllllly needs the "right" fabric. View B is okay so maybe another time for that one.

I bought this in the larger size range, L-XXL. I really needed a medium up top and a large on bottom. But as you can see, the top and bottom are one piece so I'm not sure how I could grade down the bodice.


It doesn't look crotch-tastic in person. 


I ended up having to take armhole darts to make it fit a little better. There's still a tuck needed at the neckline, as you can see. 

I cut an XL at the back crotch and used royal blue bias tape for the casing. I was TOTALLY gonna use paisley again but I cut it out, stitched the ends together and realized I'd sewed them wrong. Womp-womp. 

There are two channels for elastic in the hem. I LOVE this treatment! Much nicer finish than just one. However, I started with 11", that was far too long and then I chopped off too much. So if I pull them down they look like genie pants. :)

I think it would look really cool with a fitted cropped blazer. I don't have one of those but I tried it on with the blazer I recently picked up at Target and confirmed it would look great with a jacket


Please do not ask me what they mean for finishing the bottom of the placket; I do not know. It was confusing and unclear and in the end, I did what I do...I just did what looked right. Hey, it works!!!

I have the last two tops sewn but in need of hems and will get back at it after making the suit and a couple of shells.

Later!

Wednesday, April 8, 2015

PR Wardrobe Contest: New Look 6110 and Burda 08/2014

Last night I hustled to finish my New Look top and wore it to work today. Feeling quite good in my shiny new top.

And then was asked to meet in the conference room.

And then was told I was being laid off. I was fine for awhile, well as long as I didn't need to talk....and then I cried. I never cry "outside". I never cry! Grrrrr!

Sooooo by 8:30 I was back home and keeping myself busy.

I have 3 tops done and the 4th top ready to go. I have a jumpsuit half sewn as it might get subbed in instead of the dress. But now I have time to sew something else for the concert we have tickets to so who knows!

Wah. I'm a crazy lady right now.

Sigh..

Okay...back on track...

New Lok 6110. Based on the muslin I made last year, it was a little too snug and hung up on the hips. The pattern was cut out already in a size 14 so I had to make some adjustments on the fly. I had cut it out before I remembered I needed more hip room so I opted for side splits at the hem.

I am so very happy with my top and proud of alllllll of my stripe matching!


On the dress form:

The instructions for the placket were unhelpful (that's an understatement). I was going to look through some other patterns with that type of placket but I slept on it and suddenly "knew" what I was supposed to do. Love when that happens.


As you can see I have a few puckers around it; they mostly disappear when it's on ma'body. After sewing the facing and understtiching, and topstitching...you are to turn inside out, overlap the plackets and stitch to the little flap of the shirt.


The "flap" is created when you reinforce the corners and then clip to the stitching. Now you have a free piece of fabric that you stitch between the dots on the facing pieces. I stitched a little too far which is how I got pulls. But it's a tight area to work in and I didn't want to redo it so there.

I used a poly something or another (no clue) from Hancock for the body and a broadcloth for the neckbands. Instead of adding the bands to the sleeve I added 3/4" elastic. I forgot that elasticizing the sleeves would make them slightly shorter. I will add 1-1.5" to the sleeve length for next time.


I used two large buttons instead of 3. Just cause. They are not functional as I can slip the top on and off over my head.

I really, really love it!

*******************

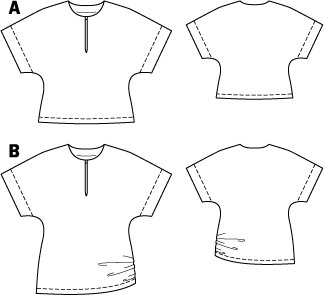
This is the same top I made for my daughter, that I decided was a really cute shape and would be better than the Kirsten Kimono tee I'd originally planned.

I traced a size 40 neck & upper shoulder/sleeve and a 42 for the body. I did not add any hem allowance AND chopped off 1" AND sewed a 2" hem!

and then realized I traced off view B which is designed to be gathered. Oh.


I ended up taking the hem in 1" on each side after sewing, tapering to nothing at the waist. It was kind of "sticky-outy" and I didn't like that. If you have sticky-outy hips that might work for you.


I decided I didn't like the keyhole as much so left it as a split neck.


I am looking forward to completing the rest of my wardrobe!

Monday, April 6, 2015

PR Wardrobe Contest; A Litttle Sewing, A Lot of Whining

There may be a lot of updates about the contest - sorry (not sorry!) ;-)

I love being able to reference my blog for info on patterns/projects so I will definitely be 'journaling' the journey here!

I'll just post my whine post from the contest thread:

 I had a package arrive and one of my fabrics was not as I expected. So I literally spent about 3 hours on Friday trying to come up with new plans and (nearly) returning to my original plan with some tweaks.

Then I made a top Friday night that looks 3 sizes too big (I've made it before). 

So I changed courses a bit AGAIN.

Then I got up today (Saturday) and began putting together my Style Arc Madeleine. Horrific PDF experience. I have used their pdf's recently for the Sandra jeans and it wasn't this bad. I just packed the whole thing up and tossed it. I've requested a new PDF if/when they correct things.

(Just to note; I've assembled many PDF's. It's scaled correctly, I trimmed each page individually, the dang thing just DOES NOT line up.)

Photo evidence:

There was NO way to get this thing lined up!

So I moved on to making a muslin of my dress bodice (M6696). It fits at the neckline, is 1.5" too small at the bust and 3" too small at the waist. Annoyed, I moved on to "easier" tasks...

I almost cut my (KNIT!) fabric on the cross grain and as I realized I was removing the selvage, corrected it. That top is stitched and needs finishing.

Then I cut out my pants and did some of the minor work on those (interfacing pieces, prepping pockets, etc). 

And now I'm doing anything BUT going in my sewing room. NOT the way I intended on starting off! Wah!

So I shut down on Saturday and woke up Sunday RENEWED! :)

But I was still disheartened by the M6696 being so off from my "normal" sizing. And realizing I didn't really know how to fix it! And seeing so many awesome versions of it! WAH!!!!!

The front has 2 darts (bust and waist), but since it has cup sizing, the neck, shoulders, back were perfect.  I was already using the D-cup pattern piece and feared doing an FBA would just equal massive, ridiculous dart...I've walked away from it for now and hope to revisit it soon, but maybe not for the contest. M7121 is cute but I don't love it. I fell for the stripes and "OMG-racerback!" but I know I hate A-line skirts on me.

So I'll probably end up sewing like 12 things and putting together my wardrobe from there...subbing in a "previously made/rtw item" if needed.

The latest (and hopefully fairly finalized) plan:


The dress is sewn but needs lining and hems (Lately I've been getting so-so ITY). I have a dress that I made 2 years ago from a FANTASTIC ITY but what I've been getting lately seems much more appropriate for tops but not dresses. :sadface:

The first 3 tops are sewn but needs hems/other finishing (and I actually pressed and pinned the hems on NL6110 this morning).

NL 6110
(muslined here, nearly a year ago!)

The color on this is SO vibrant! I don't know what kind of fabric it is; well...it's obviously polyester...but it's not chiffon, it's not charmeuse, I've never touched georgette so maybe it's that? Or peachskin?? Don't know...It wasn't as 'mean' to me as some other poly, floaty fabrics have been.

I'm "losing" this weekend to traveling and will be sewing a jacket for my daughter this week and hemming/finishing my tops.

Hope to sew my trousers next week when I get back and then start my jeans (I desperately need another pair of jeans!)