Showing posts with label New Look 6110. Show all posts

Wednesday, May 13, 2015

DONE! Pattern Review Contest Entry

Sooooo uhmm, remember those plans I uploaded before? Yeah...Never mind those.

In the end, I took out all the things I've sewn since April 1st and spread them out. I started putting together items I thought would work best (and of course that filled the contest requirements of 4 tops + 3 bottoms where all tops match all bottoms, and 2 sewer's choice).


I am very happy with my final wardrobe!!! It took an eternity to take all the photos but I am digging this wardrobe/SWAP type sewing. I want to sew all the things but I want to actually WEAR the dang things! :)

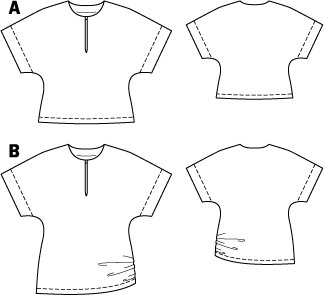
I really wanted a white piece and decided I didn't like the Burda kimono top as much as I thought. It just isn't 'crisp' enough for me. We'll see if I can make it wearable...I was *this* close to sewing a white jacket or vest or cardigan but seriously could not muster up the energy to fiddle with one more pattern. Just COULD NOT.

Since I'd been raiding my UFO box; I pulled out the navy wool jersey M6996 cardigan I cut back in January, which was pinned together in some places but still unsewn. Whipped that puppy up today as one of my "premade" / sewer's choice items. I love how well the dark navy plays with other items!

I named my wardrobe "Work Hard, Play Harder" because I really want to get my wardrobe working well together. I don't mind having some items that are exclusively 'work' or 'play' but I wanted to have a bit more cohesion and I think that I accomplished it!

Here are my combinations; you'll notice some are 'missing', but I only put together outfits that I would ACTUALLY wear.

For the dress there's obviously two options; dress alone plus dress with cardigan.

Since I know I wouldn't wear the loose, floaty NL6110 top with the straight skirt and it's too voluminous to pair with the cardigan, I eliminated those options.


For the grey top (Buda 6911); while the cardigan worked with the black skirt with the other tops, the navy, grey and black did nothing for me together, so I eliminated that option


 For the black/white striped top (M6839):


For the animal print top (M7094):

All of the items have been reviewed here on the blog; I've made M6996 a couple other times so I'm sure there's a review here somewhere :) I cut a size medium. The end :-p

McCall's 6839, Burda 6911, Vogue 1411
McCall's 7094
Style Arc Sandra

My fave looks:


Wednesday, April 8, 2015

PR Wardrobe Contest: New Look 6110 and Burda 08/2014

Last night I hustled to finish my New Look top and wore it to work today. Feeling quite good in my shiny new top.

And then was asked to meet in the conference room.

And then was told I was being laid off. I was fine for awhile, well as long as I didn't need to talk....and then I cried. I never cry "outside". I never cry! Grrrrr!

Sooooo by 8:30 I was back home and keeping myself busy.

I have 3 tops done and the 4th top ready to go. I have a jumpsuit half sewn as it might get subbed in instead of the dress. But now I have time to sew something else for the concert we have tickets to so who knows!

Wah. I'm a crazy lady right now.

Sigh..

Okay...back on track...

New Lok 6110. Based on the muslin I made last year, it was a little too snug and hung up on the hips. The pattern was cut out already in a size 14 so I had to make some adjustments on the fly. I had cut it out before I remembered I needed more hip room so I opted for side splits at the hem.

I am so very happy with my top and proud of alllllll of my stripe matching!


On the dress form:

The instructions for the placket were unhelpful (that's an understatement). I was going to look through some other patterns with that type of placket but I slept on it and suddenly "knew" what I was supposed to do. Love when that happens.


As you can see I have a few puckers around it; they mostly disappear when it's on ma'body. After sewing the facing and understtiching, and topstitching...you are to turn inside out, overlap the plackets and stitch to the little flap of the shirt.


The "flap" is created when you reinforce the corners and then clip to the stitching. Now you have a free piece of fabric that you stitch between the dots on the facing pieces. I stitched a little too far which is how I got pulls. But it's a tight area to work in and I didn't want to redo it so there.

I used a poly something or another (no clue) from Hancock for the body and a broadcloth for the neckbands. Instead of adding the bands to the sleeve I added 3/4" elastic. I forgot that elasticizing the sleeves would make them slightly shorter. I will add 1-1.5" to the sleeve length for next time.


I used two large buttons instead of 3. Just cause. They are not functional as I can slip the top on and off over my head.

I really, really love it!

*******************

This is the same top I made for my daughter, that I decided was a really cute shape and would be better than the Kirsten Kimono tee I'd originally planned.

I traced a size 40 neck & upper shoulder/sleeve and a 42 for the body. I did not add any hem allowance AND chopped off 1" AND sewed a 2" hem!

and then realized I traced off view B which is designed to be gathered. Oh.


I ended up taking the hem in 1" on each side after sewing, tapering to nothing at the waist. It was kind of "sticky-outy" and I didn't like that. If you have sticky-outy hips that might work for you.


I decided I didn't like the keyhole as much so left it as a split neck.


I am looking forward to completing the rest of my wardrobe!

Saturday, May 3, 2014

Wah. Quasi Fail

Today wasn't my day. I will highlight all of my mishaps on the Lady Skater in the review post...but I worked it out.

All we need now are neck/sleeve bands and hems. 

Progress;

So I needed then, to make a project for me! ;-)

I've been wanting to make NL 6110 for a long time. I had the cotton from SR Harris slated for this and the pattern was already cut out so I got started. 


I was scared I wouldn't have enough fabric so I decided to do view C with the shorter sleeves of view D. And then got the bright idea to use contrast for the bands. 

And then it started. 

This pattern is not hard. But if you look up the word 'fiddly' in the sewing dictionary...this pattern would be listed. 

The front, back, top and bottoms of the sleeves are all gathered. You have the sleeve bands. The -oddly shaped and in need of uber careful stitching- band. Just so many things and so many places where something can go wrong (if you're me). 

Note to self, if you use the shorter sleeves they will hit you at a higher place. And so the bands will need to be bigger. See. Things like that. 

Meh. 

The good:


That's a nice lookin sleeve and band! 

The ok: 

It's cute! But the imperfections show. 

The ugly:


Wavy band, poor stitching in the ditch and topstitching. And, what the heck happened with the band?!?! I dunno. I'm going to add a little fake placket square doo-dad to cover it up...

I LIKE the top on me...and I like this fabric. I guess this will be a muslin. Or hopefully I'll pull it out later and not notice all of my hiccups. I hope!

Size 14 with size 12 sleeves (reviews said they ran big). I think if you're slim, small cup size, your traditional size may feel too big. But above a C cup or with a little extra fluff...and you need those gathers and extra room to help get over the lady lumps! :)

My husband thinks the print + shape is dowdy. I think it's perfect to toss on on the weekend with skinny jeans or my new shorts!

**oh also, I thought I was going to eventually make this up in chiffon?? Heck. No. Too flippin' fiddly. Maybe a rayon challis?? Maybe.